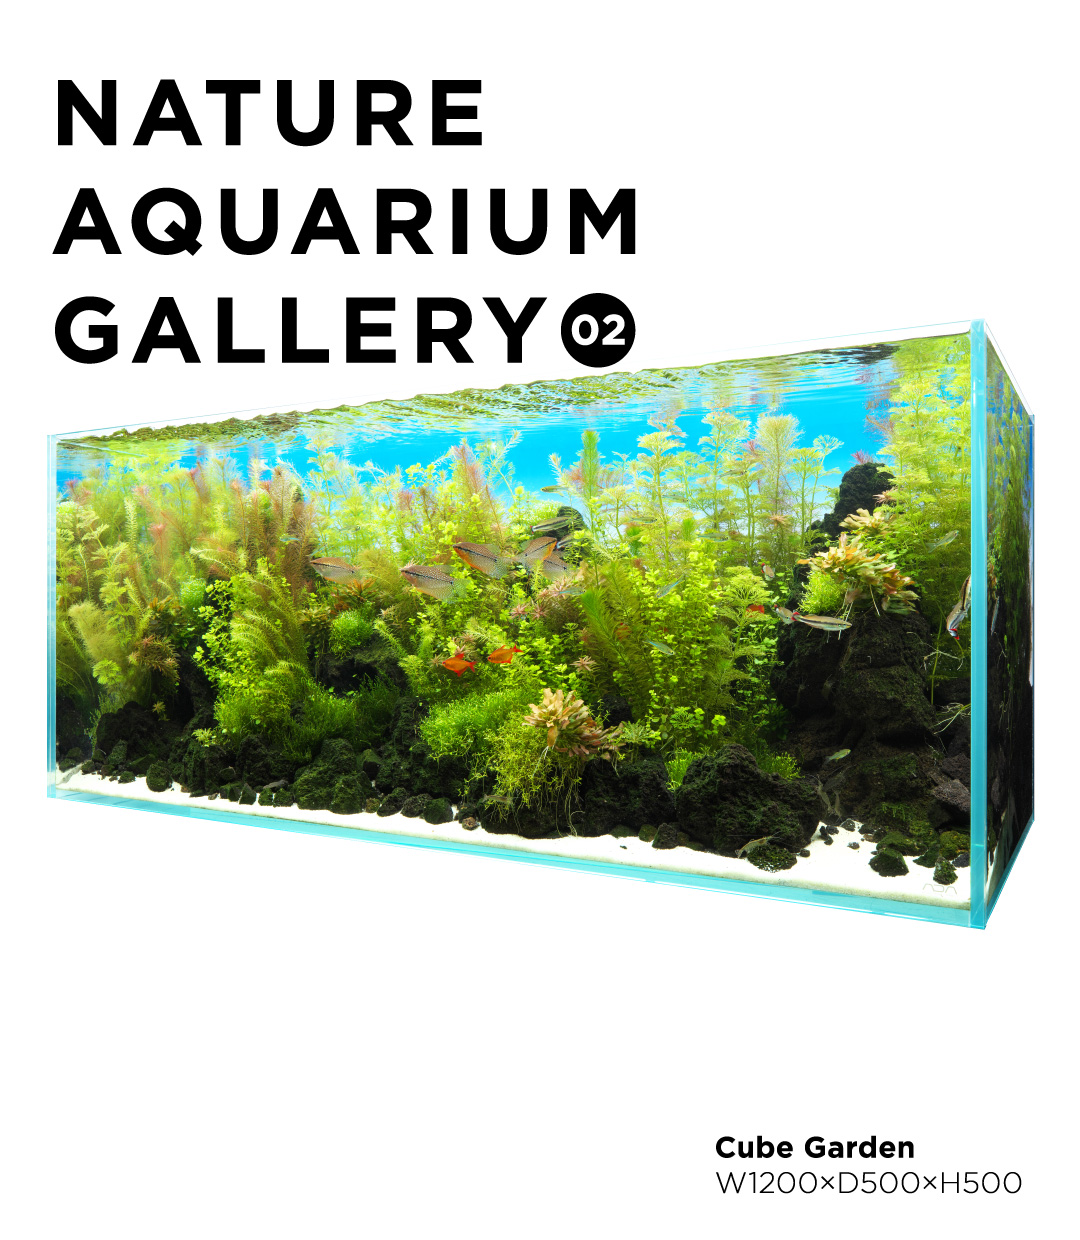


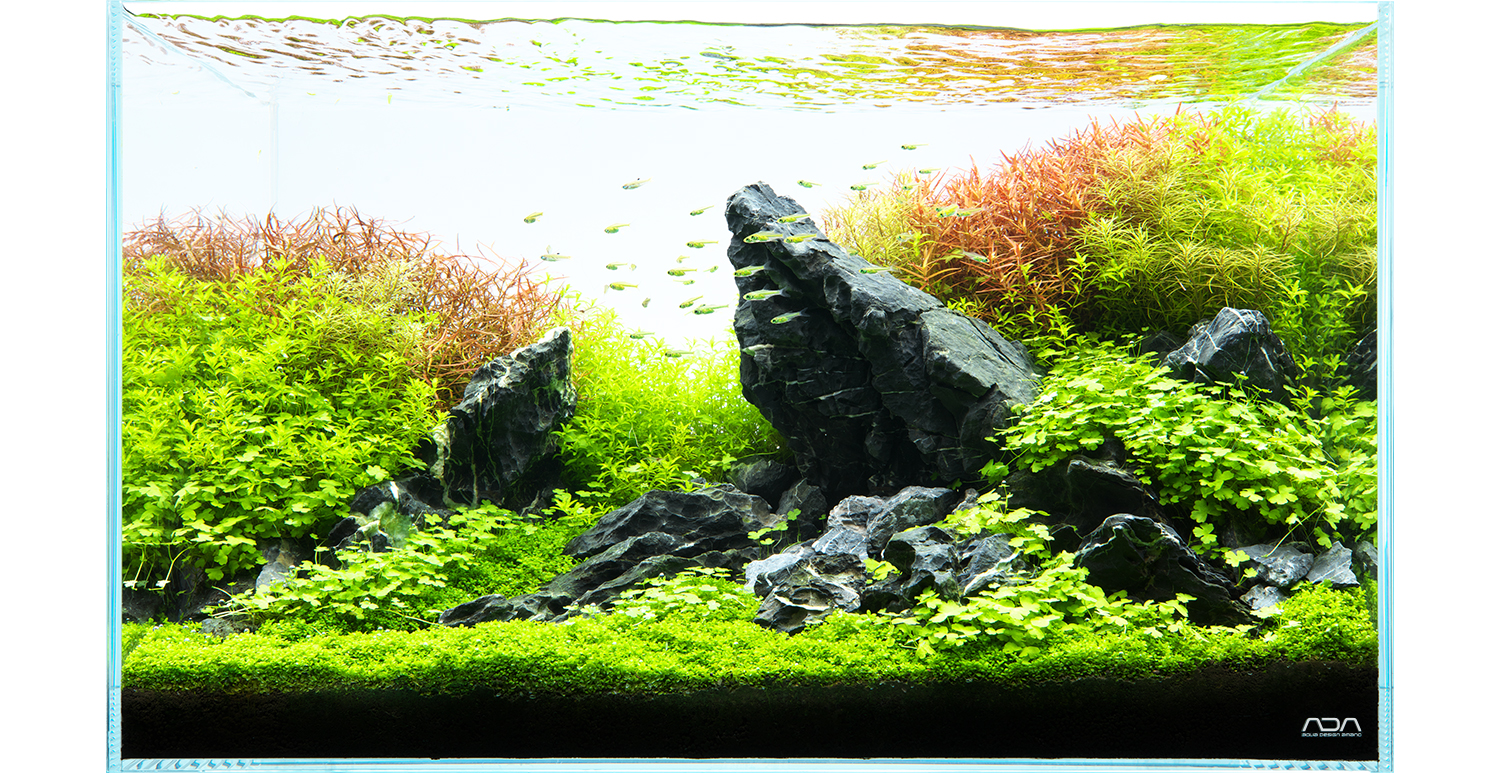
ADA Review ‘Seven Steps to Creating Beautiful Aquatic Plant Clusters’
Although the expression of the beauty of aquatic plant clusters is often considered as one of the most difficult techniques in Nature Aquariums, anyone can create beautiful planted aquariums by understanding the characteristics of aquatic plants. In this section, we will introduce the seven steps to enjoy the beauty of aquatic plant clusters, with key points explained by the Suikei Creator, Naru Uchida.
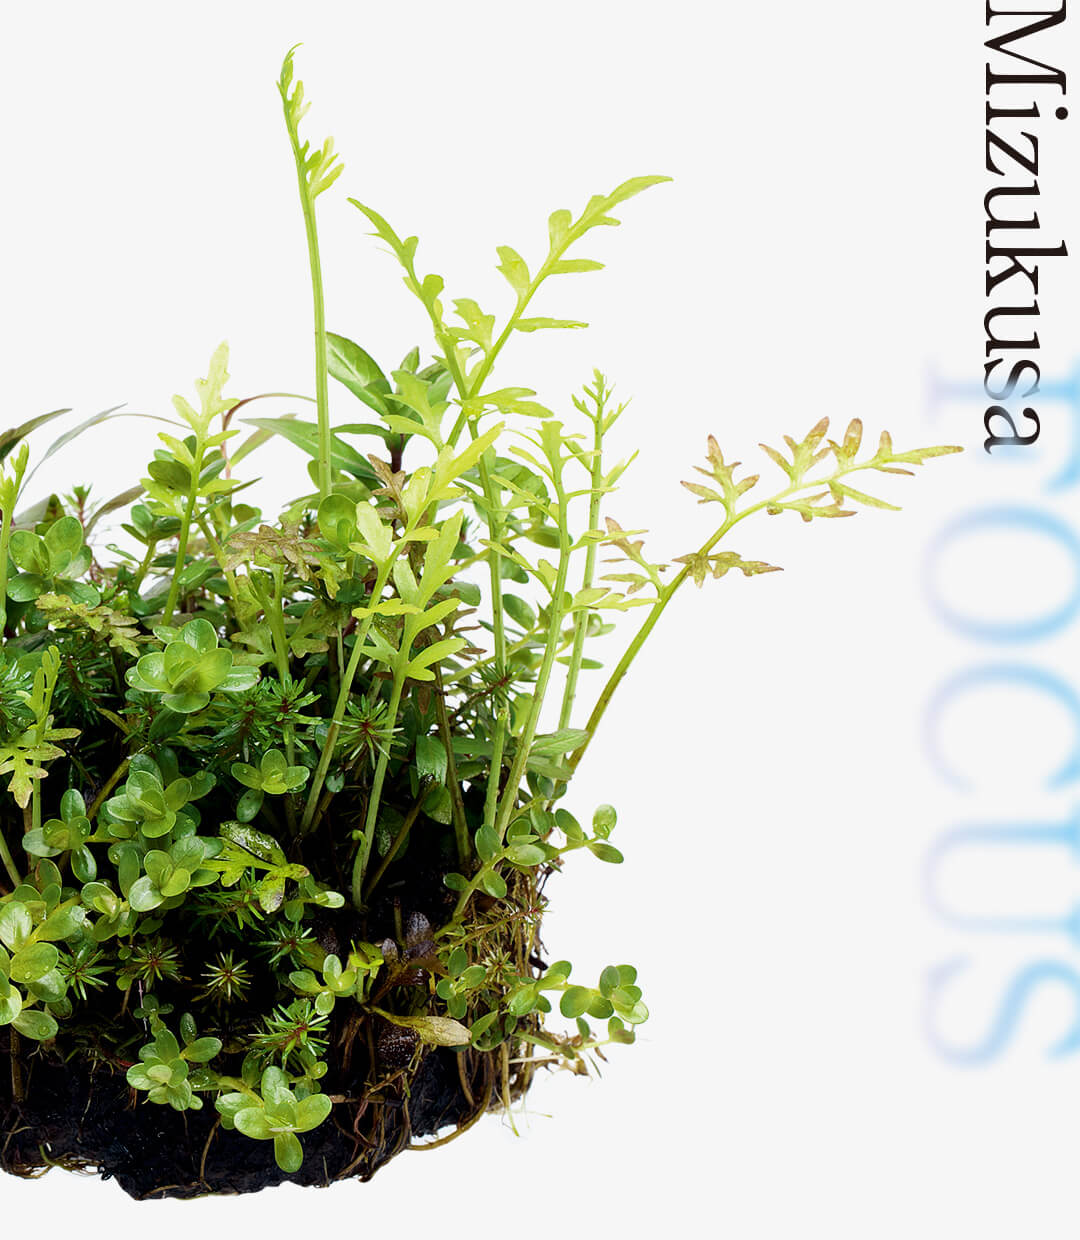
STEP 1 Selection of aquatic plants
Review the characteristics of aquatic plants before deciding which ones to use and how to plant them. Planting the right plants in the right places will make later maintenance easier.
Considering the characteristics of aquatic plants
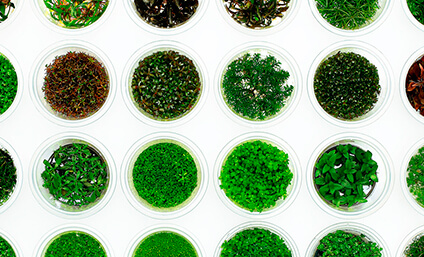
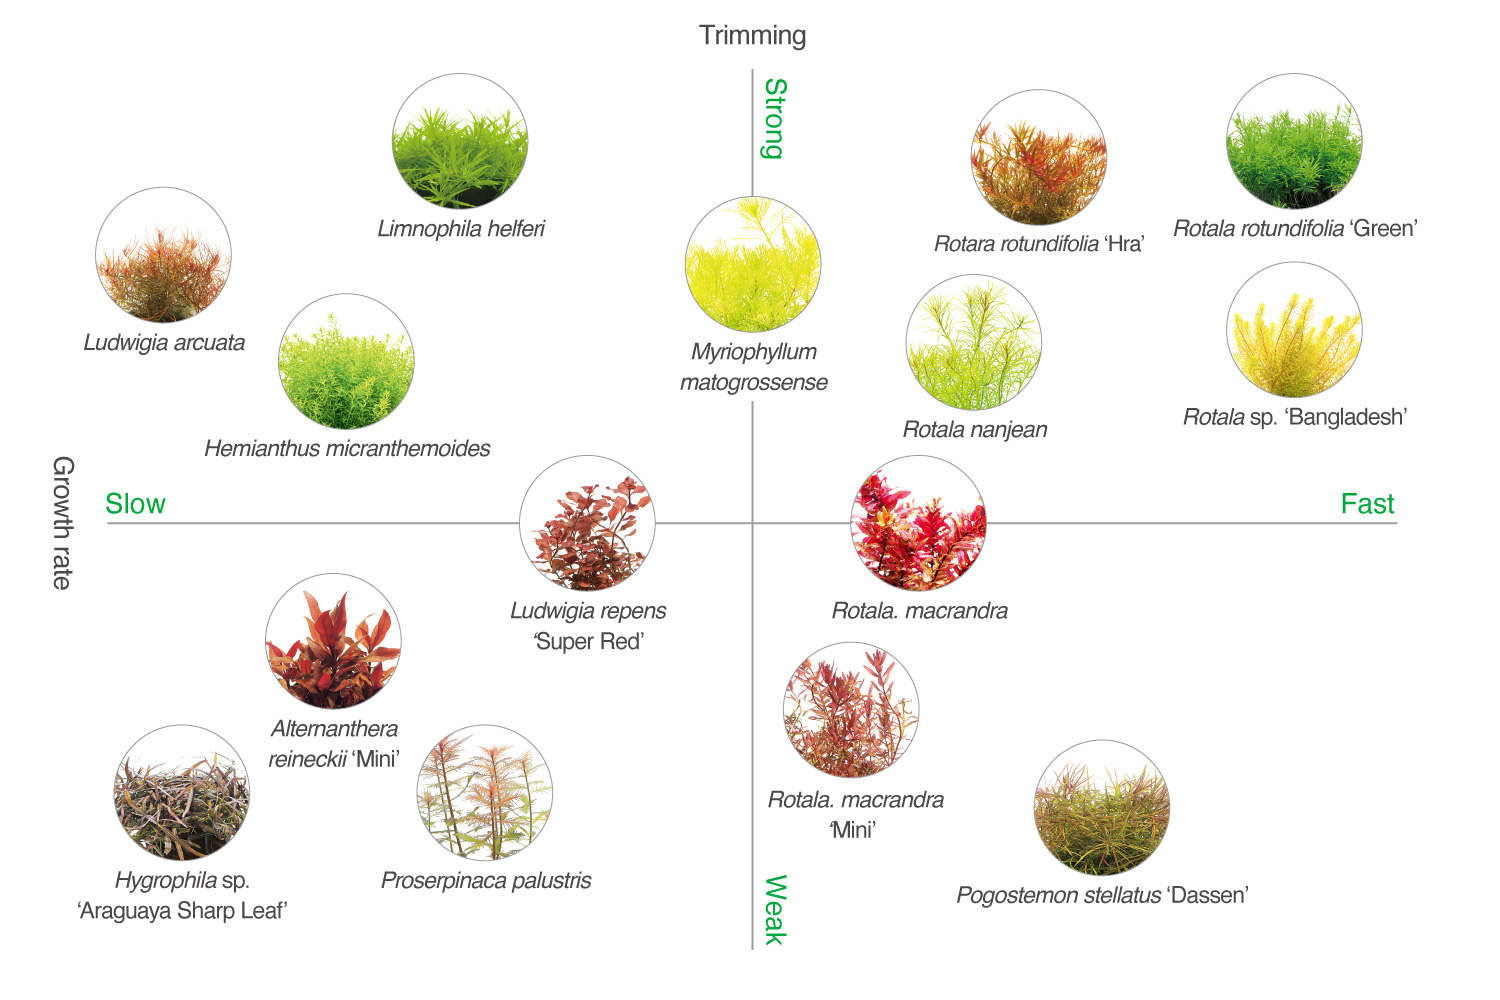
Consider the growth rate of the aquatic plants and the strength against trimming when planting. Basically, the slower growing aquatic plants should be planted in the front. The aquatic plants shown in the above figure are in the BIO Mizukusa no Mori lineup and are available in clean condition.
Consider the growth rate of the aquatic plants and the strength against trimming when planting. Basically, the slower growing aquatic plants should be planted in the front. The aquatic plants shown in the above figure are in the BIO Mizukusa no Mori lineup and are available in clean condition.

Slow-growing aquatic plants are easily overtaken by other aquatic plants. Hence, they may not grow as you envision when you plant them. It is important to secure sufficient space for planting in advance.
Red aquatic plants should be at the center of gravity of the composition.
Striking aquatic plants, such as red aquatic plants and plants with large leaves, should be placed at the center of gravity in the composition to create a sense of stability.
Striking aquatic plants, such as red aquatic plants and plants with large leaves, should be placed at the center of gravity in the composition to create a sense of stability.
STEP 2 Planting
A little extra effort at planting time is the first step toward a beautiful aquatic plant cluster. Get off to a good start by completing the following steps.
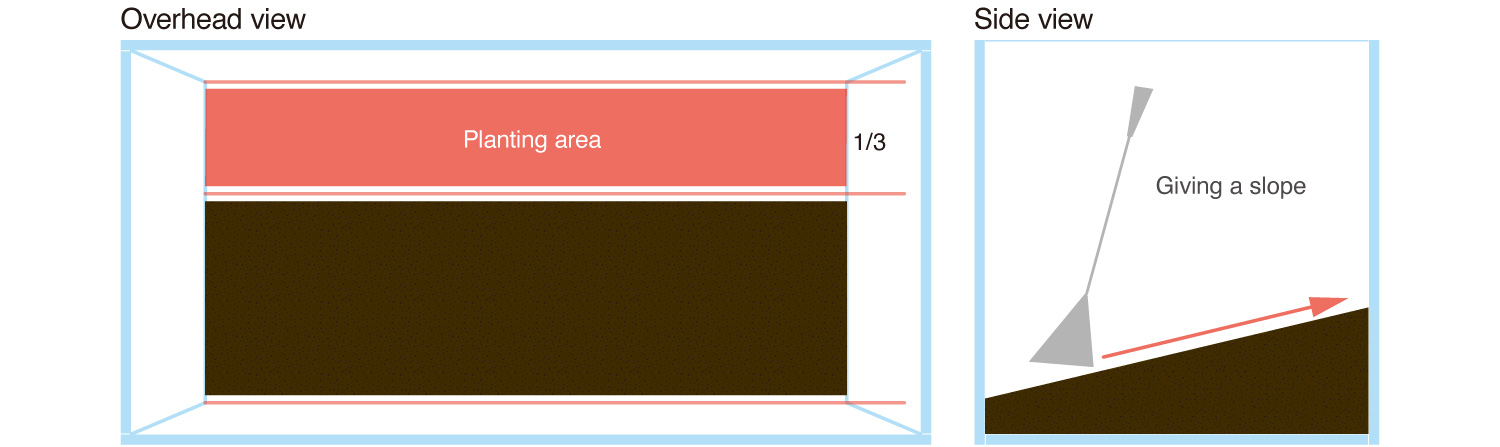
【Overhead view】 If the number of aquatic plants planted is too small, it will result in unintentionally poor bushes. It is recommended that about 1/3 of the bottom surface be reserved for planting space at the composition stage.
【Side view】 If making a mound with soil, you will have more planting options because the planting area is larger. The slope also makes it easier to create bushes with high volume.
【Side view】 If making a mound with soil, you will have more planting options because the planting area is larger. The slope also makes it easier to create bushes with high volume.

When planting “BIO Mizukusa no Mori” plants, be sure to thoroughly wash off any media that could easily cause mold. Plant the aquatic plants at an angle to prevent them from falling out of the substrate even when water is poured in.
【Planting orientation】 Use Pro-Pinsettes to plant from the front while tilting the plants to the side of the layout material.
STEP 3 Trimming
This is an unavoidable and necessary process in creating an aquatic plant cluster. Aim to create a dense and beautiful cluster through repeated trimming.
How to trim stem plants
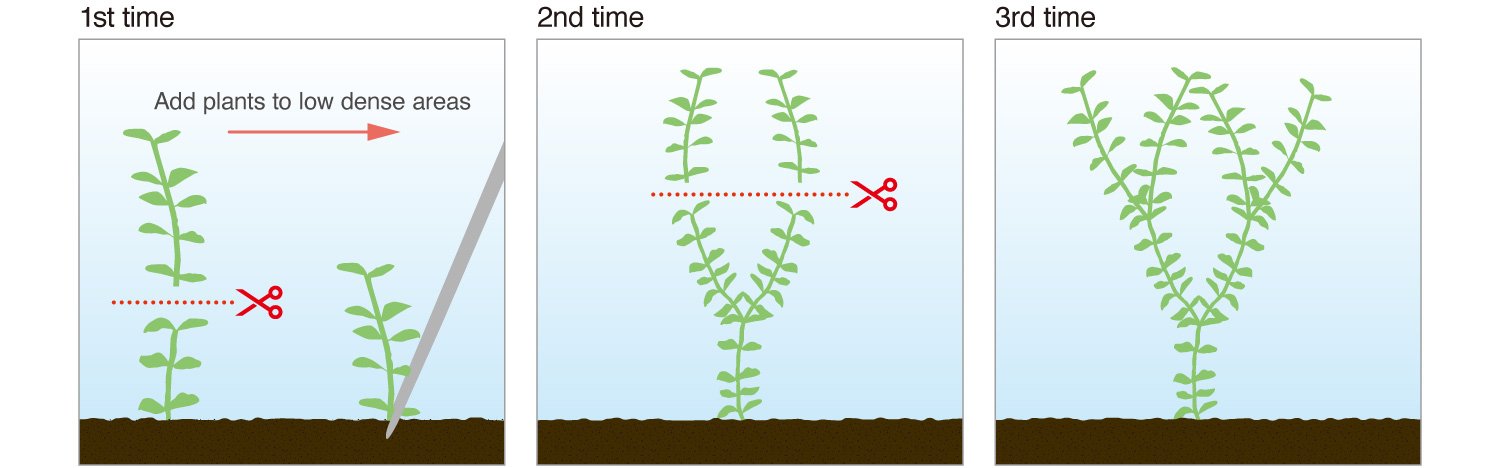
The first trimming is done about one month after planting, and the cut stems are planted in less dense areas. By repeating 2, 3 times, stems will branch and grow densely.
The first trimming is done about one month after planting, and the cut stems are planted in less dense areas. By repeating 2, 3 times, stems will branch and grow densely.
For trimming, the Pro-Scissors Short Straight type and Curve type are convenient. Use different types depending on the situation
Trim-line
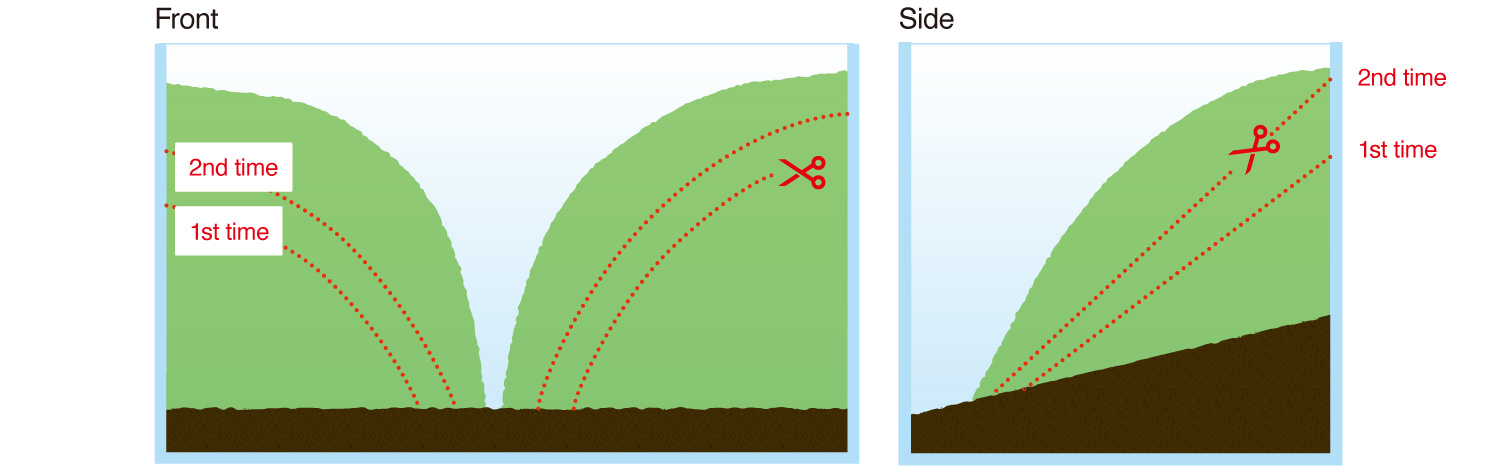
For trimming in the front direction, it is best to mark the back with curing tape to prevent mistakes. For the side direction, the key is to cut sharp angles from the apex as shown in the figure below.
Green Gain Plus
Since aquatic plants are temporarily stressed after trimming, add Green Gain Plus, which is effective in increasing resistance, to encourage the development of new buds.
STEP 4 Thinning out
Once the grouping is completed by trimming, the stem plants can be thinned out as needed to maintain the look for a longer period of time.
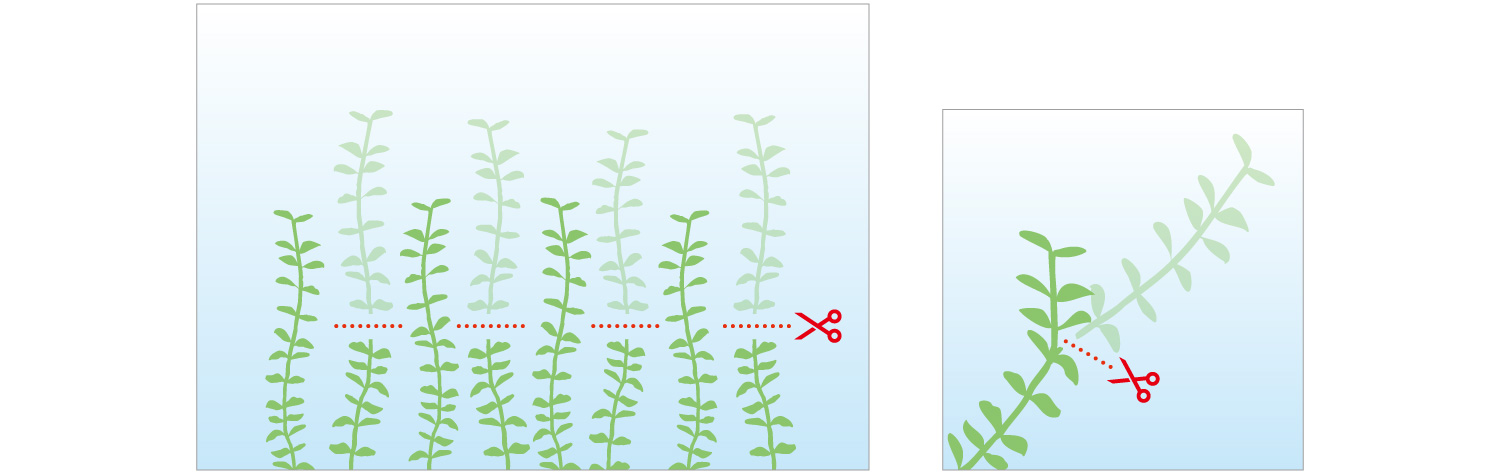
When thinning, cut above any lateral buds. Even if you maintain the plants by thinning, be sure to replant because the lower stems are less exposed to light, and will weaken. Incidentally, this technique originated from the maintenance of aquascapes for events to keep them looking their best for a long time.
Maintain the beautiful aquatic plant cluster by thinning it out.
Maintaining the plants by trimming alone will result in too much density, which will reduce water permeability and cause blue-green algae. Thinning out adjacent aquatic plants at different heights will keep them looking good for a longer period of time.
Maintaining the plants by trimming alone will result in too much density, which will reduce water permeability and cause blue-green algae. Thinning out adjacent aquatic plants at different heights will keep them looking good for a longer period of time.
STEP 5 Replanting
Cutting back the stem plants is essential to the long-term maintenance of the aquascape. Once growth begins, return to the steps in STEP 3

Cutting by size
Pull the stem plant from the root and cut off the weakened lower stem part. Cut the remaining main body of the stem plant, leaving the terminal buds, and divide it into about three sizes.
Pull the stem plant from the root and cut off the weakened lower stem part. Cut the remaining main body of the stem plant, leaving the terminal buds, and divide it into about three sizes.

If the substrate collapses after the maintenance work, add more soil. Also, if nutrients in the substrate are insufficient, fertilize with Bottom Plus at this time.
Replanting in order of shortest to longest
Replant the cut stems back in the order of smallest to largest, from front to back. This way, when they root and begin to grow, the terminal buds will line up nicely.
Replant the cut stems back in the order of smallest to largest, from front to back. This way, when they root and begin to grow, the terminal buds will line up nicely.
STEP 6 Addition of liquid nutrients
Adding liquid nutrients at the right time is the key to creating a beautiful aquatic plant cluster. Select and add liquid nutrients according to the growth conditions of your aquatic plants.
After trimming, the aquatic plants are not able to absorb nutrients fully due to lack of active photosynthesis. It is important to start adding liquid fertilizers at a lower amount than the prescribed amount and increase it step by step as you observe the condition.
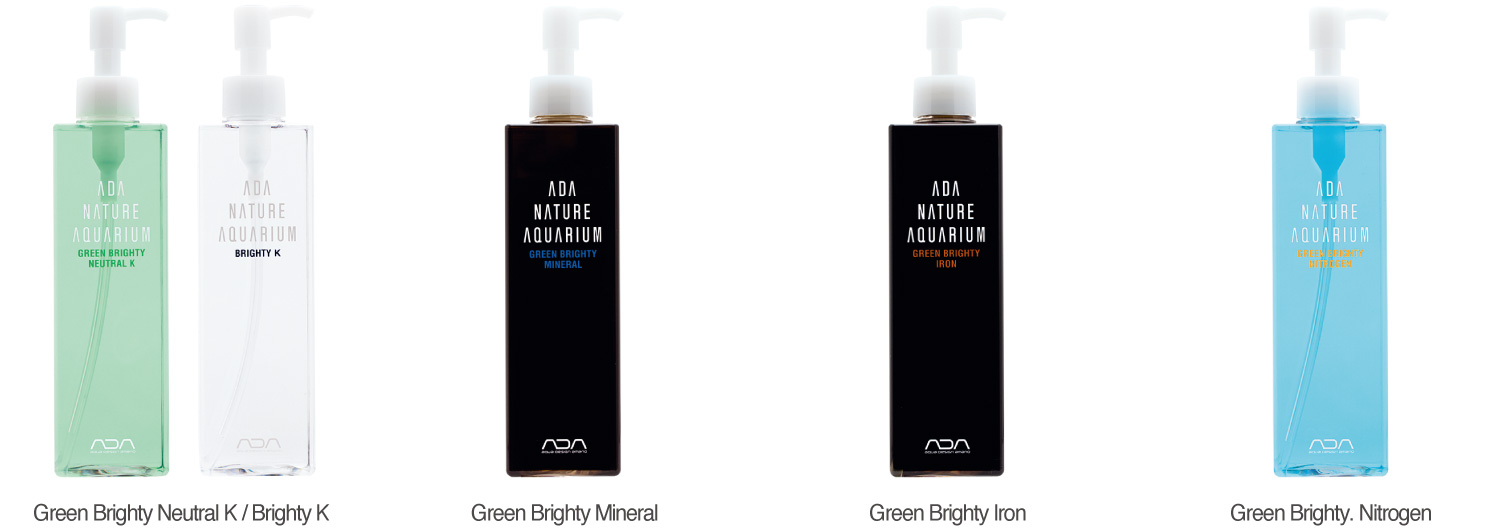
Green Brighty Neutral K / Brighty K.
To promote photosynthesis, start adding Green Brighty Neutral K in the early stages of setting up. Brighty K is suitable for aquatic plants that prefer a certain degree of hardness or when the pH of tap water is low.
Green Brighty Mineral
Minerals are essential for the growth of aquatic plants. Add Green Brighty Mineral in combination with Green Brighty Neutral K from the initial setup to around 2 months.
Green Brighty Iron
Add Green Brighty Iron after 2 to 3 months, when aquatic plants are in their thriving phase. The iron in the water makes the leaves brighter and promotes further growth. It also prevents chlorosis.
Green Brighty Nitrogen
If maintained for a long period of time, the nitrogen content in the substrate will become deficient and the aquatic plants will turn white. Green Brighty Nitrogen should be added before the growth of aquatic plants slows down.
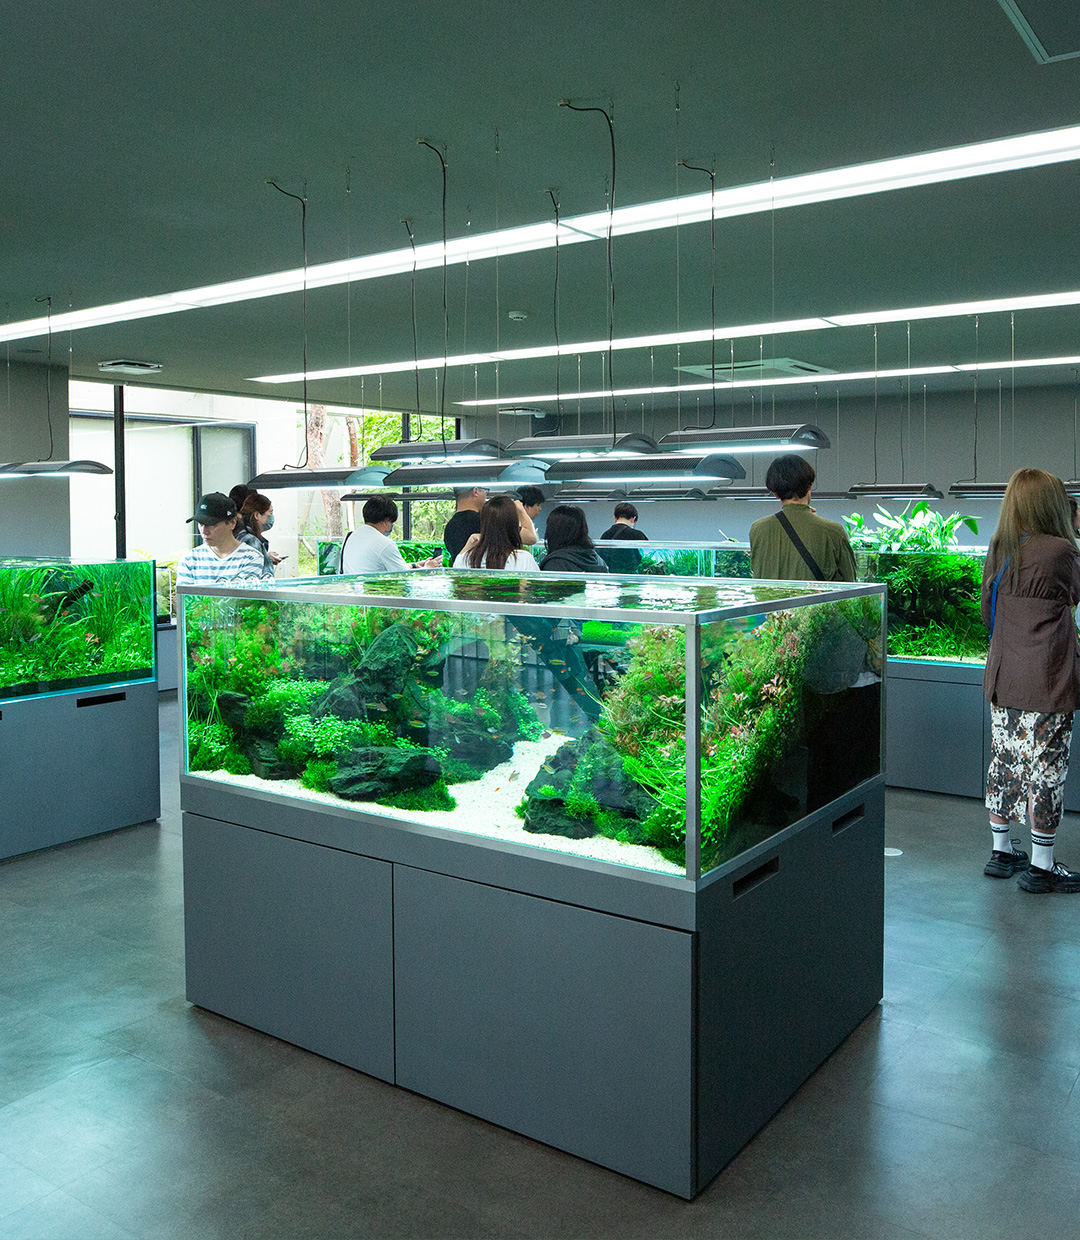
STEP 7 Creating an up-graded aquatic plant cluster beauty
Complete an up-graded Nature Aquarium by utilizing goods that enhance the beauty of the cluster.
After trimming, uncut aquatic plants may pop up from the bushes and disrupt the aquascape. Pick these out frequently and keep the bushes in line to maintain the beauty of the cluster!
Light Screen 60
The Light Screen is an LED backlight attached to the back of an aquarium. By illuminating the light from the back, the silhouette of stem plants will stand out more beautifully. The light intensity can be fine-tuned to your preference with the dimming function.
ECA Plus
Add ECA-Plus to your aquatic plants to improve their condition by one rank. The organic acids and ferrous iron make the foliage color more vivid and also help prevent chlorosis.